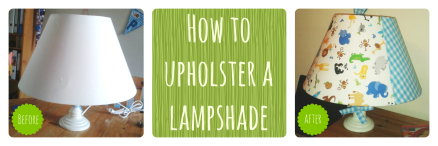
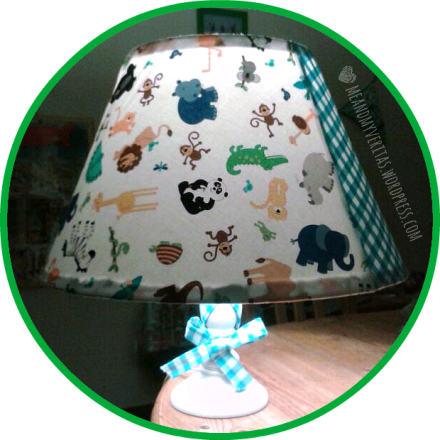
 Today I am going to present my first tutorial about how to recover or upholster a lampshade. I did this project last winter shortly after we had moved to Canada. Back in Germany, my son’s room was more or less the second half of our home office, which is why it never turned out as cozy and comfortable as I always imagined it to be. Therefore, last year I put a special portion of love and energy into the decoration of his room: the lampshade being one part of the whole ensemble. He has chosen the fabric (Happy Zoo) himself and now loves loves loves his lamp. I guess he noticed that it is something special. Let’s hope he will soon realize that it was made for someone special, as well.
The tutorial is actually pretty simple and does not need a lot of sewing skills. It comes in 12 steps and can be done in about 16 days if you spend ONLY 15 minutes a day.
Here is a list of the materials I used:
- Lamp with lampshade (see below)
- Packing paper (or old newspaper, gift wrap, etc.)
- Scissors
- Adhesive tape
- Pen
- Fabric (dimensions depend on the size of your lampshade)
- Tailor’s chalk
- Pins
- Fabric glue
- Sewing machine (or needle & thread)
- Binder clips
- Double-sided adhesive tape
- Iron and ironing board
Note: I found both lampshade and lamp foot in a local thrift store. You can usually get there various kinds of lampshades and feet and often it is possible to swap parts in order to make it your ideal lamp. The less structured the lampshade is the easier it is to cover it with fabric in a smooth and clean manner.
But now: Let’s start with the tutorial and happy making!
STEP 1: Wrap Lampshade
In order to get the exact shape of the lampshade, cover it with packing paper. If you are working with small parts of paper, stick them together with adhesive tape for more robustness. Of course, you can use any kind of paper. For example, old newspaper will work fine, as well. At the curved top and bottom edges of the lampshade, fold the paper over towards the inside. Using a pen mark the exact positions of top and bottom edges as well as where the paper overlaps along the vertical dimension (i.e., the height).
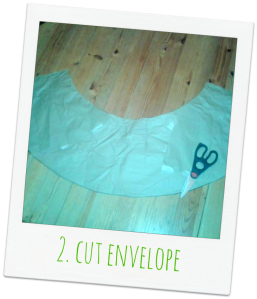
STEP 2: Cut Envelope
Remove the packing paper from the lampshade and cut along the markings. The envelope of your lampshade should look something like the one shown in the picture and will exactly match the outer surface of the lampshade. This envelope functions as a stencil. Note that the height of this stencil corresponds to the height of your lampshade, whereas the curved top and bottom lines correspond to the circumference of the top and bottom circles that make up your conical lampshade.
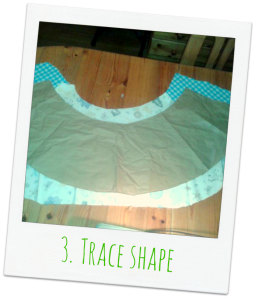
STEP 3: Trace Shape
The shape of the lampshade stencil is now traced onto the left side of your fabric of choice by using tailor’s chalk (or any other suitable marking device). I have chosen a combination of two fabrics (Happy Zoo and blue checked) in order to better match the newly upholstered lampshade with other items that I had sewn for my son’s room. The amount of fabric needed depends on the size of your lampshade. If you are going to buy new fabric in a store, I recommend bringing the stencil along.
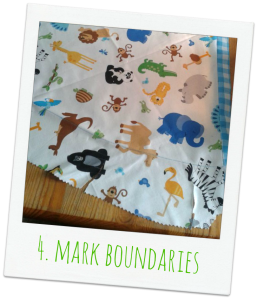
STEP 4: Mark and Cut Boundaries
For convenience I traced the shape of the stencil on both sides of the fabric. If you are a Sewbie like me, this makes things much easier. Leave a seam allowance of about 5 cm at each side (the curved and the straight ones) and cut your fabric.
STEPs 5 and 6: Fold and Sew
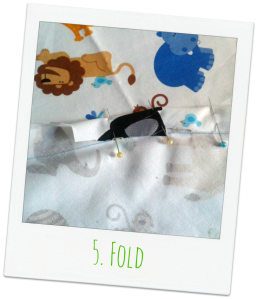
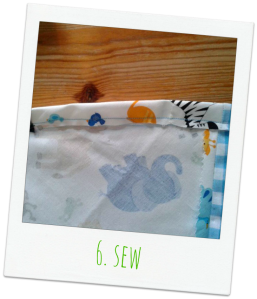
Starting with the curved bottom edge, fold the fabric left side on left side at about 2 cm (measured from the marking) towards the marking. As the fold line is curved, I found it easier to cut into the seam allowance for about 1 cm every few centimeters (see picture). The raw edge of the fabric should slightly overlap the marked line. Pin down and sew exactly along the marking. This will give something like a hem. Later on, the fabric will be folded down towards the interior at this seam, so that it will not be visible from the outside. Moreover, the hem will be glued to the interior of the lampshade, which is why there is no need to make a (nicer looking) double-folded hem. Repeat steps 5 and 6 for the curved top edge.
STEP 7: Close New Cover
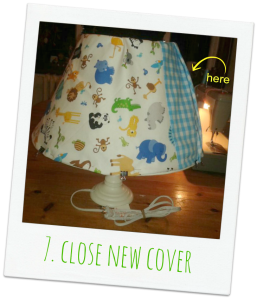
At this point you should be able to nicely wrap the lampshade with your cover. As you left some seam allowance, the straight endings are supposed to overlap a bit (marked with “here” in the picture). Slightly stretch the fabric to smooth out any wrinkles and pin the cover in place. Using tailor’s chalk mark the position at which both short ends come together (where they actually meet).
STEP 8: Sew Closing Seam
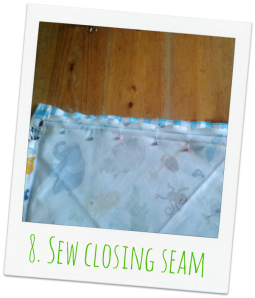
Take the cover from the lampshade. Fold it in half widthwise left side on left side, overlay the open endings at the marking you just made, and pin them in place. Sew the closing seam. I trimmed the edges using a Zigzag stitch in order to keep the raw edges of the fabric from fraying.
STEP 9: Glue Cover to Lampshade
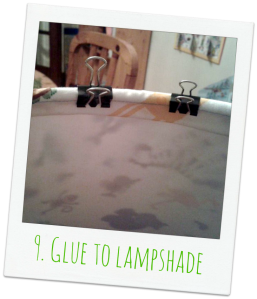
Pull the cover over the lampshade and, if everything worked out nicely, it should fit like a second skin. I found it easier to carefully stretch the cover while pulling it over. Arrange the cover in a way that the seams at the curved top and bottom edges lay in the inside. This even further stretches the fabric and makes it pretty smooth. Pin the smoothened cover in place with binder clips. When you are happy, carefully glue the fabric to the lampshade using fabric glue. I applied glue to the inside of the lampshade in two thin straight line (one at the top the other at the bottom). Do not use more glue than necessary. In my case the following working steps worked just fine: I removed 2 binder clips at a time, applied the glue, adjusted the fabric, and put the binder clips back into place. I did this until the full round was completed and then continued with the top edge. I let the glue dry and the glue smell vanish for about 2 days. Note that the fabric glue I used turns transparent once it is dry. This is very convenient because it will give no ugly dark visible lines once the lamp is turned on in the dark.
STEPs 10 and 11: Make and Arrange Bias Tape Ribbon
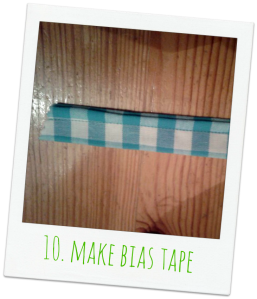
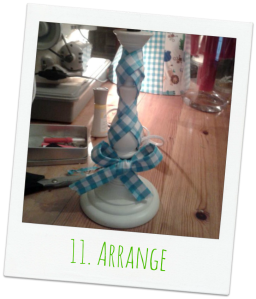
- Using the second fabric, I made a double-folded bias tape ribbon (see SIDE NOTE below) and looped it around the stem in order to also draw attention to the foot of the lampshade. The final ribbon is ~100 cm long and ~2 cm wide. You can cut the ends in an angle of about 55 degrees by using pinking scissors, which helps preventing the raw edges from fraying.
SIDE NOTE: How to Fold a Double-Folded Bias Tape or Make a Bias Tape Ribbon:
You can easily make your own bias tape or bias tape ribbon from any fabric. I like to do this because this ensures that the bias tape optimally matches the other fabric(s) I am using in a particular project.
- Cut a strip of fabric (the length of the strip decides the length of your tape). I used the following dimensions: ~100 cm long and ~8 cm wide
- Fold the strip in half lengthwise (left side on left side) and give it a nice press with an iron (better test this with an offcut of your fabric).
- Open up the strip.
- Fold both long edges of the strip into the center (they will meet at your first fold line). This time do not open the strip.
- Fold the strip again in half lengthwise along the first fold line. Give everything a good press and et voilà: The double-folded bias tape is ready to rumble.
- In order to transform it into a nice bias tape ribbon, simply sew along the open long edge thereby closing the tape and generating a ribbon.
STEP 12: Attach Both Units
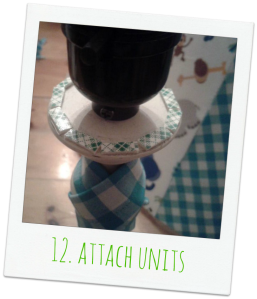
To assemble both units stick double-sided adhesive tape to that region of the foot that is going to hold the aluminum framework of the lampshade. Similarly, stick the lampshade on top of the tape. You can place some books on top of the lampshade in order to tightly press it onto the sticky tape. Let it sit for a while (1 night should be fine). Alternatively, you could glue both units together using an all-purpose adhesive. However, I preferred to reduce the release of solvent vapor to a minimum.
Hooray! You are done! *applause, applause* You have upholstered a lampshade and made a super lovely and unique product! I was really happy how my lamp turned out and could not wait to show it to my little one. He was loving it right away and was switching HIS lamp on and off the whole evening like he was sending a light Morse code to his neighbors… 🙂
I would love to see your finished upholstered lampshades. Please leave a link in the comments to your best pictures on Pinterest, Flickr or your blog. I will add them to a Maker Gallery, which I will try to set up until then. 😉
All the best,
Jana
Please leave a comment… Ich freue mich auch sehr über Kommentare auf Deutsch. 🙂


We found this very useful, thank you! We create upcycled, repurposed and recycled decor and have found quite a few lampshades on sidewalks and on landfills, but we had no idea how to go about this. Now we do! 🙂
LikeLiked by 1 person
Thank you very much! I am glad this post helped. Please write about yours once they are done. Would love to see them. Best wishes, Jana
LikeLiked by 1 person