

Welcome to the second post of my “Felt Tools” toy series. Today I would like to introduce The Screwdriver—a quick but very cute project for every little construction worker or handyman. And let’s face it! Who doesn’t need a screwdriver??? 🙂 If you are interested, please also have a look atmy Felt Saw post.
Here is how I made the Felt Screwdriver.
List of the materials (affiliate links included):
- Felt (blue and grey)
- This Screwdriver Pattern
- Pinning needles
- Standard scissors
- Embroidery needle and embroidery floss (blue and white)
- Filling/stuffing material
- Shashlik skewer or pencil
- Sewing machine (optionally: standard needle and blue standard thread)
STEP 1: Cut the patterns for the screwdriver handle, the tip, and the round end piece.
STEP 2: Transfer the patterns of handle and end piece onto blue felt using white tailor’s chalk or a magic marker and cut the felt. Similarly, transfer the tip pattern onto grey felt and cut it. You will need two pieces of the tip and one piece of each the handle and the end piece. (Please ignore that the end piece is marked twice in the picture below. While optimizing this pattern, I changed the design… So, you just need ONE end piece.) For the screwdriver tip, you can pin two pieces of felt together prior to cutting them (see upper part in the picture below).

STEP 3: Sew the handle together with the help of your sewing machine and using blue thread. Optionally, you can sew this step by hand using a straight or running stitch. If you are using a printed fabric instead of felt and there is a wrong and a right fabric side, fold right side onto right side before starting to sew.

STEP 4: Turn the handle inside out.

STEP 5: Lay both tip pieces on top of each other (as shown below) and start sewing the tip together with a blanket stitch. I used an embroidery needle with white embroidery thread.

Continue until almost the end and leave a small opening. Don’t cut the thread.

Start to stuff the tip using filling material (e.g., the inner life of an old or unused pillow). The ends of a shashlik skewer or pencil can help to fill material through small openings. Stuff until the tip is quite tight.

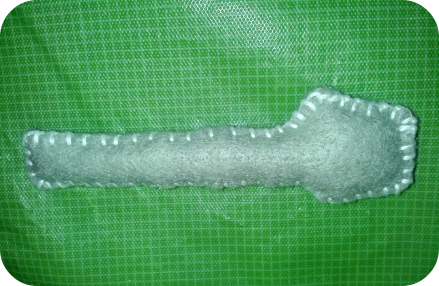
Finally, close the oping again using a blanket stitch and the thread you didn’t cut earlier. This is how the tip should look like at this point.
STEP 6: Sew the round end piece onto the handle using a blanket stitch as shown below. Again, I used an embroidery needle and blue embroidery thread.

This is how it should look like now…

STEP 7: Start to stuff the handle using filling material (see step 5). This time, the end of a wooden cooking spoon is quite helpful to insert the material. Again, stuff until the handle is quite tight.

STEP 8: Take the screwdriver tip from step 5 and center it’s stem in the opening of the handle (see picture below). Use an embroidery needle and blue embroidery thread to sew tip and handle together. The whole assembly becomes quite tight and secure if you stitch in diagonales and always through the stem of the tip.

And that’s it! You are done. So cute, right? It’s actually one of my favourite felt tools… 😉

Hope you enjoyed the tutorial and good luck with your felt screwdriver creation. Please stop by again soon in order to learn how to make the remaining felt tools (a saw, a hammer, a wrench, a carpenter square, and a tool belt).
If you like what you see on this site and have not followed this blog yet or liked Me & My Veritas on Facebook, please do it right away. Your support is highly appreciated!
Please click here and leave a comment… Ich freue mich auch sehr über Kommentare auf Deutsch. 🙂

Ohh. That is so cute. Every little man must have it. :)0
LikeLiked by 1 person
I totally agree! 🙂 Thank you very much for stopping by and your kind words! Best, Jana
LikeLike
So fun! I love how you made your own patterns, so original 🙂
LikeLiked by 1 person
I wish I had a little man to make these for. Very cute.
LikeLiked by 1 person
Thank you very much! I just love to do this. Everything is in my hands (dimensions, colour, difficulty etc.) when designing my own patterns. Plus I often don’t find it difficult. 🙂 Have a great weekend, Jana
LikeLiked by 1 person
I can totally understand! 🙂 Thank you very much for stopping by and leaving a comment. I sometimes wish I had a little girl, too. Then I could sew pleates and ruffles etc. 😉 Have a wonderful weekend, Jana
LikeLike
Yes it really is cute! A fantastic tutorial as always, Jana.
PS. My felt phone kit arrived a couple of days ago, can’t wait to sew it up! Thank you!!
LikeLiked by 1 person
Hooray! 🙂 I so hope you will like it! And thanks again for always being so kind to comment here! This blog is so lovely because of people like you! 🙂 Have a nice weekend, Jana
LikeLiked by 1 person
Adorable! A lovely creation x
LikeLiked by 1 person
Thank you so much! I am super happy that you like it! 🙂 How are you? And have a lovely weekend, Jana
LikeLiked by 1 person
I’m plodding along thanks. I love felt so can’t wait to see what you come up with next! Hope your having a good weekend too. x
LikeLiked by 1 person
Will hopefully focus a bit more on clothes in the future… It’s just way more work to prepare a post. 😉 Would you like to be a pattern tester? Will ask officially via a post in a few days to weeks. Work is crazy at the moment (but in a good way). 🙂
LikeLiked by 1 person
Would love to but it’s only fair to warn you that due to my conditions I’m not the most reliable when it comes to deadlines x
LikeLiked by 1 person
Cute. I hope the little one enjoys it.
LikeLiked by 1 person
Thank you! 🙂 He does! He loves it! Have a great week, Jana
LikeLiked by 1 person
That’s really cute! Once I figure out how to use my sewing machine (it’s still in the box it arrived in) I’ll have to give it a try.
LikeLiked by 1 person
So cute…you’re so creative!!!!
LikeLiked by 1 person
Yes, please! Give it a try and let me know how helpful the tutorial was! And I would love to see your version. 🙂 If you want I can even include it in my “Your Makes Gallery” along with your name and blog address. Thanks a lot for stopping by and have a wonderful day.
LikeLike
Awww. 🙂 Thank you very much for your super kind words! They made my day! 🙂 Have a lovely day. Best, Jana
LikeLiked by 1 person
Pingback: Very Inspiring Blogger Award | After Dark Sewing
Once you make all the tools you’ll need a tool belt to carry them in. Sew fun! 🙂
LikeLiked by 1 person
Of course, this Felt Tools Series contains a tool belt, too. 🙂 Recycled from an old pair of my jeans… 😉
LikeLiked by 1 person
Pingback: DIY Tissue Bag To Go | Me & My Veritas
Pingback: Homemade Gingerbread House with Pattern & Recipe: Part 1 | Me & My Veritas
Hi Jana. Great to see you post again. This is so pretty. It will be a pity to eat it. Haha
Sandra
LikeLiked by 1 person
Hi Sandra, I know it has been a while… 😉 And you are right: We haven’t touched the house yet… Still enjoying it as a special Christmas decoration. Thanks for stopping by. Have a lovely evening, Jana
LikeLiked by 1 person
Pingback: Homemade Gingerbread House with Pattern & Recipe: Part 2 | Me & My Veritas
Pingback: Homemade Gingerbread House with Pattern & Recipe: Part 3 | Me & My Veritas