

I have been afraid of cuffs for a very long time. However, recently I made a few long-sleeved shirts and pants for my son and discovered: They aren’t that bad. In order to show you how straightforward and simple it can be to sew perfect cuffs, I wrote this post. It does not matter whether you want to sew cuffs onto sleeves of a shirt or legs of a pants, this tutorial will work. You can basically use the same strategy to sew cuffs onto pants as waistbands or to sew thin cuffs onto shirts as necklines.
Some notes on cuff fabric choice and requirements first:
1. Cuff fabric is a fabric with pronounced stripes. It is most stretchable into the direction that is perpendicular to these stripes. So if your stripes go from top to bottom, the fabric can be stretched best to the sides. For cuffs, you will need to cut a rectangular piece of fabric. Always cut cuff fabric with the stripes being parallel to the short side of this rectangle.

2. The dimensions of your cuffs strongly depend on the stretchability of the fabric. It is best to measure the wrist or ankle circumference of the respective person, and then take only that length of cuff fabric that is—when stretched—a bit longer than this measurement.
3. As you will see during steps 5 and 6, we are going to divide each cuff and each sleeve into 4 equidistant parts and mark each with a pin needle. While sewing (step 7), only the cuff fabric will be stretched in order to align corresponding pin needles of the cuff and the sleeve. This way the cuff will later be stretched equally around the sleeve.
4. I am using an overlock machine here. If you are using a standard sewing machine, use a flexible stitch (such as a ZigZag stitch) first and sew at a distance of about 0.2 inches (i.e., 0.5 cm) from the edge. Then sew again, this time along the edge, to keep it from fraying.
But now let’s get started:
STEP 1: Lay your cuff fabric in front of you with the wrong side facing up (picture below, top). Then fold it horizontally to the right (picture below, bottom).

STEP 2: Pin in place. If you feel comfortable enough to sew this without pinning, you can skip this step.

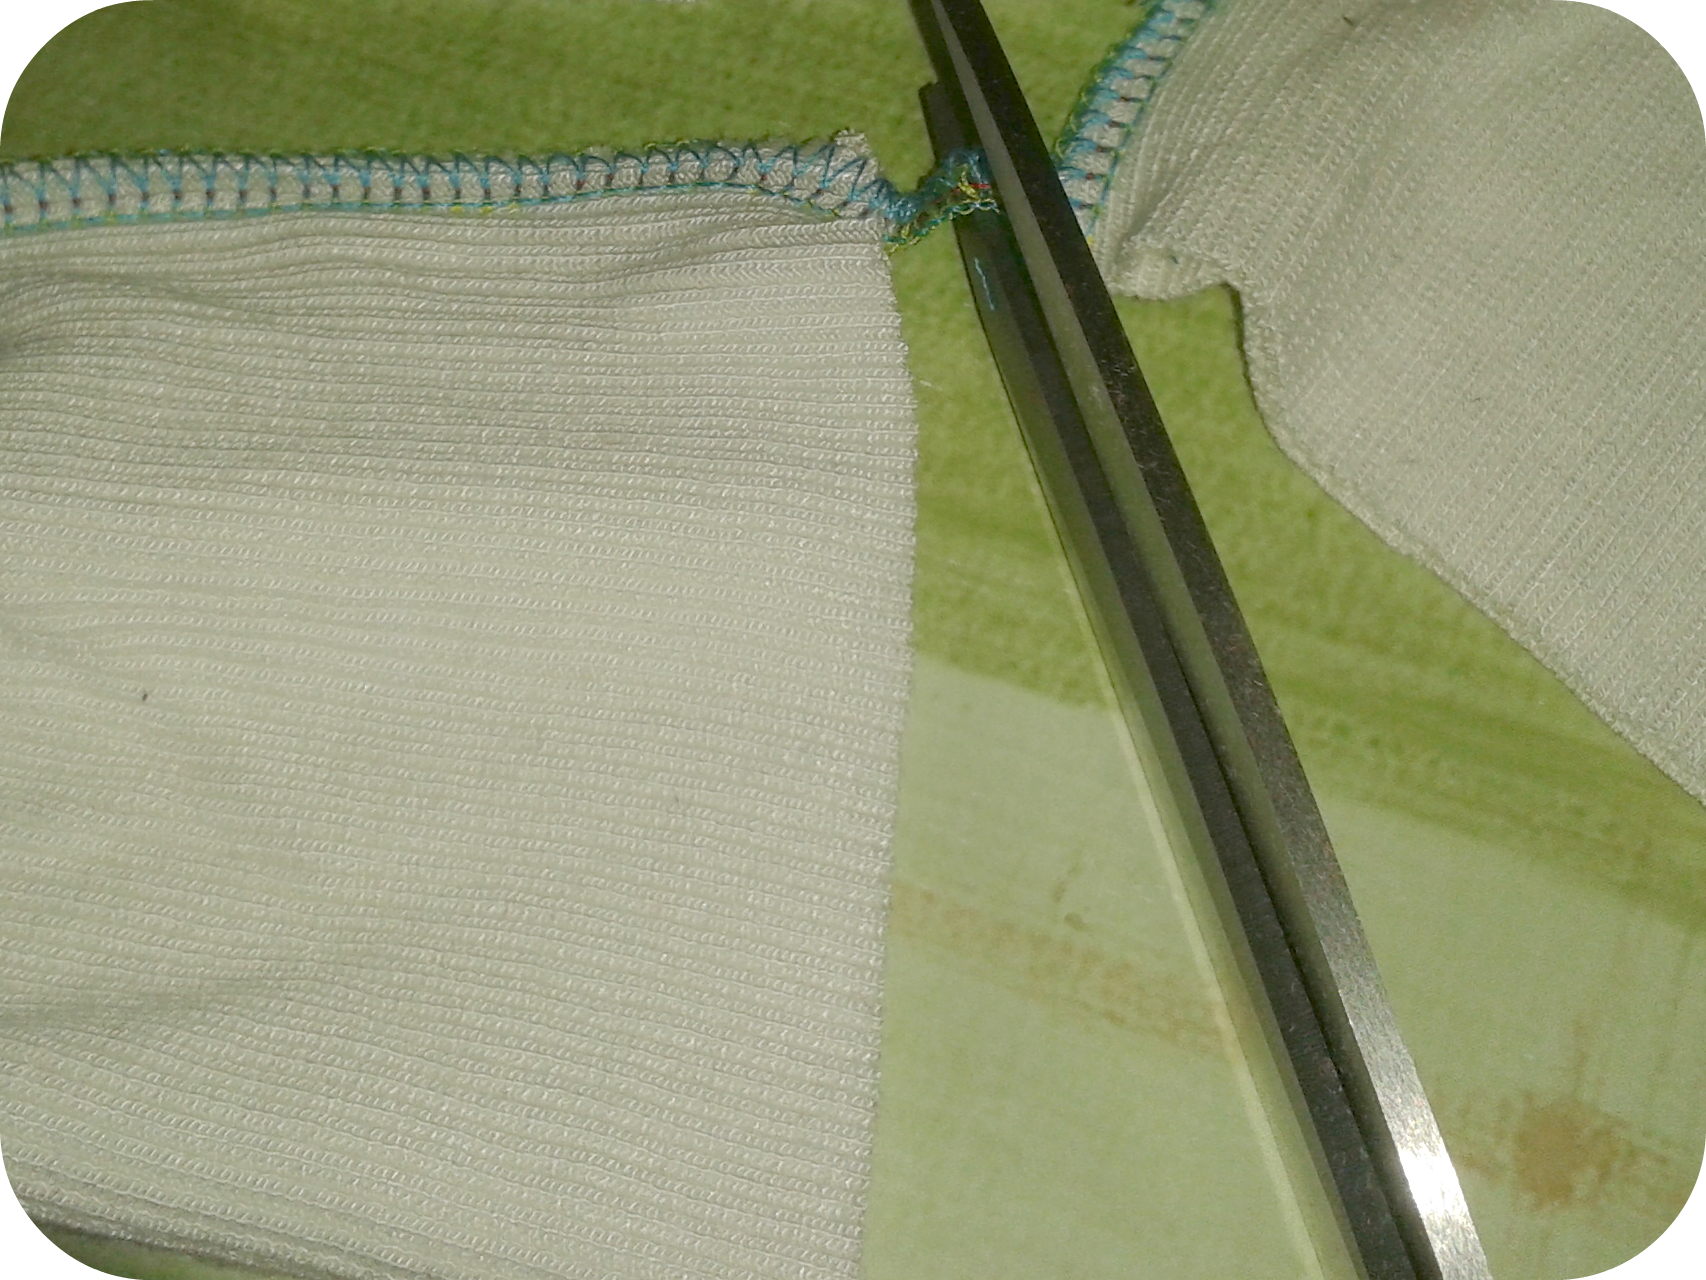
STEP 3: Start sewing along the short edge (the one you just pinned). It is advisable to remove pins while they approach the pressure foot.

When done sewing the first cuff, guide the next cuff under the pressure foot and continue sewing. This is much faster than sewing each cuff individually.

Again, you basically sew both cuffs in a row without cutting the thread.

Then cut the thread in-between both cuffs.
STEP 4: Take one cuff and fold it in half: wrong side to wrong side (as shown in the picture below, right). Thereby you are hiding the seam in the inside.

Make sure that both seams are perfectly aligned on top of each other.

STEP 5: Lay the folded and aligned cuff in front of you…

…and mark the outer edges with two pins. The heads of the pins face the raw edges of the fabric.

Move the pins on top of each other and straighten the cuff…

…in order to mark the new outer edges with another two pins.

STEP 6: Proceed similarly with the sleeve as explained above for the cuff. First, lay it straight in front of you.

Mark the outer edges with two pins.

Move the pins on top of each other and straighten the sleeve…

…in order to mark the new outer edges with another two pins.

STEP 6: Take the cuff and turn it with its raw edges away from the sleeve. For both cuff and sleeve the right sides of the fabrics face outside.

Move the sleeve into the cuff piece (the cuff hugs the sleeve)…

…and carefully guide it towards the end.

Make sure to perfectly align the two cuff seams (in the inside of the cuff piece) with the sleeve seam (in the inside of the sleeve). This way you will later get only one but neat seam.

STEP 7: Remove the two pin needles that mark the seam region and carefully move everything (keep seams aligned!) under the pressure foot and start sewing.

While sewing, pull the cuff fabric so that its next pin needle comes to lay on top of the next pin needle of the sleeve (see picture below for clarity). Do not stretch the sleeve fabric.

Continue as described above for pin needles 3 and 4 and sew until you reach the starting point. Sew a bit over it to secure the seam.

This is how your seam will look like afterwards. Pretty, right? 🙂

STEP 8: Turn the cuff inside and admire your beautiful and perfect cuff.

See how the seam of the sleeve and the seam of the cuff form a single line? That looks awesome.

Hope you had fun and good luck with your perfect cuffs! Please stop by again soon. And if you have not followed this blog yet and liked Me & My Veritas on Facebook, please do it right away.
Please click here and leave a comment… Ich freue mich auch sehr über Kommentare auf Deutsch. 🙂
I am linking this to Kiddikram, Made4Boys, fuersoehneundkerle, Talented Tuesday, and Threading My Way.

One who has never done this before should easily understand how it’s done. Nice ly done. 🙂
LikeLiked by 1 person
Thank you so much! I really hope this tutorial will help others! Have a lovely weekend, Jana 🙂
LikeLike
Oh da habe ich bei meiner ersten Hose lange Geflucht😜!! Mal sehen wie es in Zukunft klappt!😘
LikeLiked by 1 person
I love the multi-coloured overlocker thread not sure if you did this just for the tutorial but it looks great, I sometimes think the plain white/black/grey I tend to use makes it look homemade.
LikeLiked by 1 person
I’ve not sewn cuffs before so thank you for this! 🙂
LikeLiked by 1 person
🙂 Juchuh! Danke für Deinen Besuch, liebe Anni! Na in Zukunft wird es hoffentlich durch dieses Tutorial viel viel besser! 🙂 Ich habe beim ersten Mal sicher auch ALLES falsch gemacht, was man nur falsch machen kann. 😉 Viele liebe Grüße, Jana
LikeLike
Hooray! I love it, too! 🙂 You are so right. It served two purposes. First, to make it easier to follow the tutorial. Second and more importantly, in my opinion this multi-coloured look is just perfect for kids cloths. When the serger/overlock came with 4 differently coloured threads (to make it easier to learn how to thread upper/lower looper and both needles) I immediately fell in love with the multi-coloured seams. So for now I stick to them. 🙂 Have a lovely weekend and thanks again for stopping by.
LikeLiked by 1 person
You are welcome! Hope it makes you wanna try some. Best to you 🙂
LikeLiked by 1 person
Perfect!
LikeLiked by 1 person
Thank you! 🙂
LikeLiked by 1 person
This is an excellent tutorial! I have never done this before but it makes total sense and I have a project coming up that is going to need this! Thanks!!!
LikeLiked by 1 person
Jessica, thank you very much for stopping by! It’s wonderful to read that this tutorial makes sense and motivates you to try sewing cuffs. With the right knowledge at hand, it is really no big deal! Good luck with your upcoming project and best wishes to you, Jana
LikeLiked by 1 person
Liebe Jana,
herzlichen Dank fürs Verlinken deiner Anleitung bei Made4BOYS! Ich bin sicher, sie wird so manches Mal für Bündchennähanfänger eine Hilfe sein!!
Liebe Grüße,
Sabine
LikeLiked by 1 person
Hallo Sabine. Da fühl ich mich aber geehrt, dass Du persönlich vorbeischaust. Vielen lieben Dank dafür. 🙂 Ich hoffe wirklich sehr, dass das Tutorial anderen eine Hilfe ist und somit mehr Menschen Gefallen am Nähen finden. 🙂 Die herzlichsten Grüsse in die Heimat, Jana
LikeLike
What a cool tutorial!
I just started sewing so I have a lot to learn but thank you so much for the tutorial:)
Besos
LikeLiked by 1 person
Hola y muchas gracias! I am glad if this post will be of help to you! You will make progress rapidly! Cheers, Jana
LikeLiked by 1 person
Pingback: DIY Egg Carton for Play Shop | Me & My Veritas
great tutorial! thank you
LikeLiked by 1 person
Thank you so much! I really enjoy to come up with tutorials that show how easy things can be. 🙂 I am glad you like it!
LikeLiked by 1 person
Very well explained, Jana!!!
LikeLiked by 1 person
Thank you so much, Pam.
LikeLike
What a well written and detailed tutorial!
Thank you for sharing at Talented Tuesday Link Party! Hope to see you again this week!
LikeLiked by 1 person
Thank you! Also for stopping by at my side! Love your link party! Best, Jana
LikeLike
Yay! You’ve got the serger out! And clearly enjoying it!
LikeLiked by 1 person
Yeah! 🙂 I so love love love it and will never give it away! 🙂 It makes so beautifully and professionally looking seams… Hugs to you, Jana
LikeLiked by 1 person
Thank you for this tutorial. Easy and looks great!
LikeLiked by 1 person
Awww, thank you so much! 🙂 I’m glad it is of help! Good luck with your project and have a lovely day, Jana
LikeLike
This is a great tutorial, but this is applying ribbing to sleeves or legs. These are not “cuffs”.
LikeLiked by 1 person
Dear Kathy, thank you very much for your helpful comment! I’m going to double-check with a friend and, if necessary, will change the tutorial accordingly. It’s sometimes not so easy to find the right word if you are not a mother-speaker. 🙂 So, thanks again and have a lovely day, Jana
LikeLike