
 We are going to make yummy Mortadella style sausage slices from felt today. As is true for the felted sliced cheese and salad leaves, Mortadella slices are perfect for felt sandwiches and easy peasy to make. This project is great for any felt food newbie, because it requires only one sewing step that is best done by hand. The tutorial comes in 8 steps, and 2 slices of Mortadella sausage can be done in about two to three 15-minute crafting sessions.
Here is a list of the materials I used:
- Pink felt
- Pieces of white felt (e.g. leftovers)
- Scissors (ideally one standard and one embroidery scissors)
- This pattern (or create a pattern you like more)
- Pin needles
- Magic marker pen (or colored tailor’s chalk)
- White standard thread and standard needle
I can highly recommend the following items (please note that the links below are affiliate links):


Useful Note: Felt is a textile where natural (woollen) or synthetic (acrylic) fibres have been pressed together. Some felts are very soft but others are strong enough to be used as a construction material (e.g., some nomadic people still use felt to build yurts). In this tutorial I am using acrylic felt of a thickness of 2 mm. I never had issues with shrinking or bleeding while washing them.
But now: Let’s start with the tutorial and happy making!
Directions:
STEP 1: Children have such a vivid imagination; some of them really bite into felt food and especially small children might suck on it. For sure we do not want our little ones to swallow the leftovers of industrial production. Thus, wash the felt before starting this project.
STEP 2: Print the pattern (see above) or create a pattern you like more and cut it. If you are using my pattern, the Mortadella slices will perfectly fit onto the felt sandwich bread I made earlier. Keep the size in mind when making your very own Mortadella slice pattern.
STEP 3: Place one piece of pink felt onto a second one and fix in place by using pin needles. Place the pattern on top of the felt and trace its shape using a magic marker or colored tailor’s chalk. If you are using chalk, I recommend blue one, because it gives a nice contrast. Remove the pattern.


STEP 4: Cut along the markings by using standard scissors. You will end up with two blank Mortadella slices (in my case I made 5 slices in total).


STEP 5: From some white felt leftovers cut different shapes the size of a 10-cent coin. These shapes will represent the white spots (the pork fat cubes) that are usually found in a Mortadella-style sausage. Align about four white pieces onto one pink raw slice.


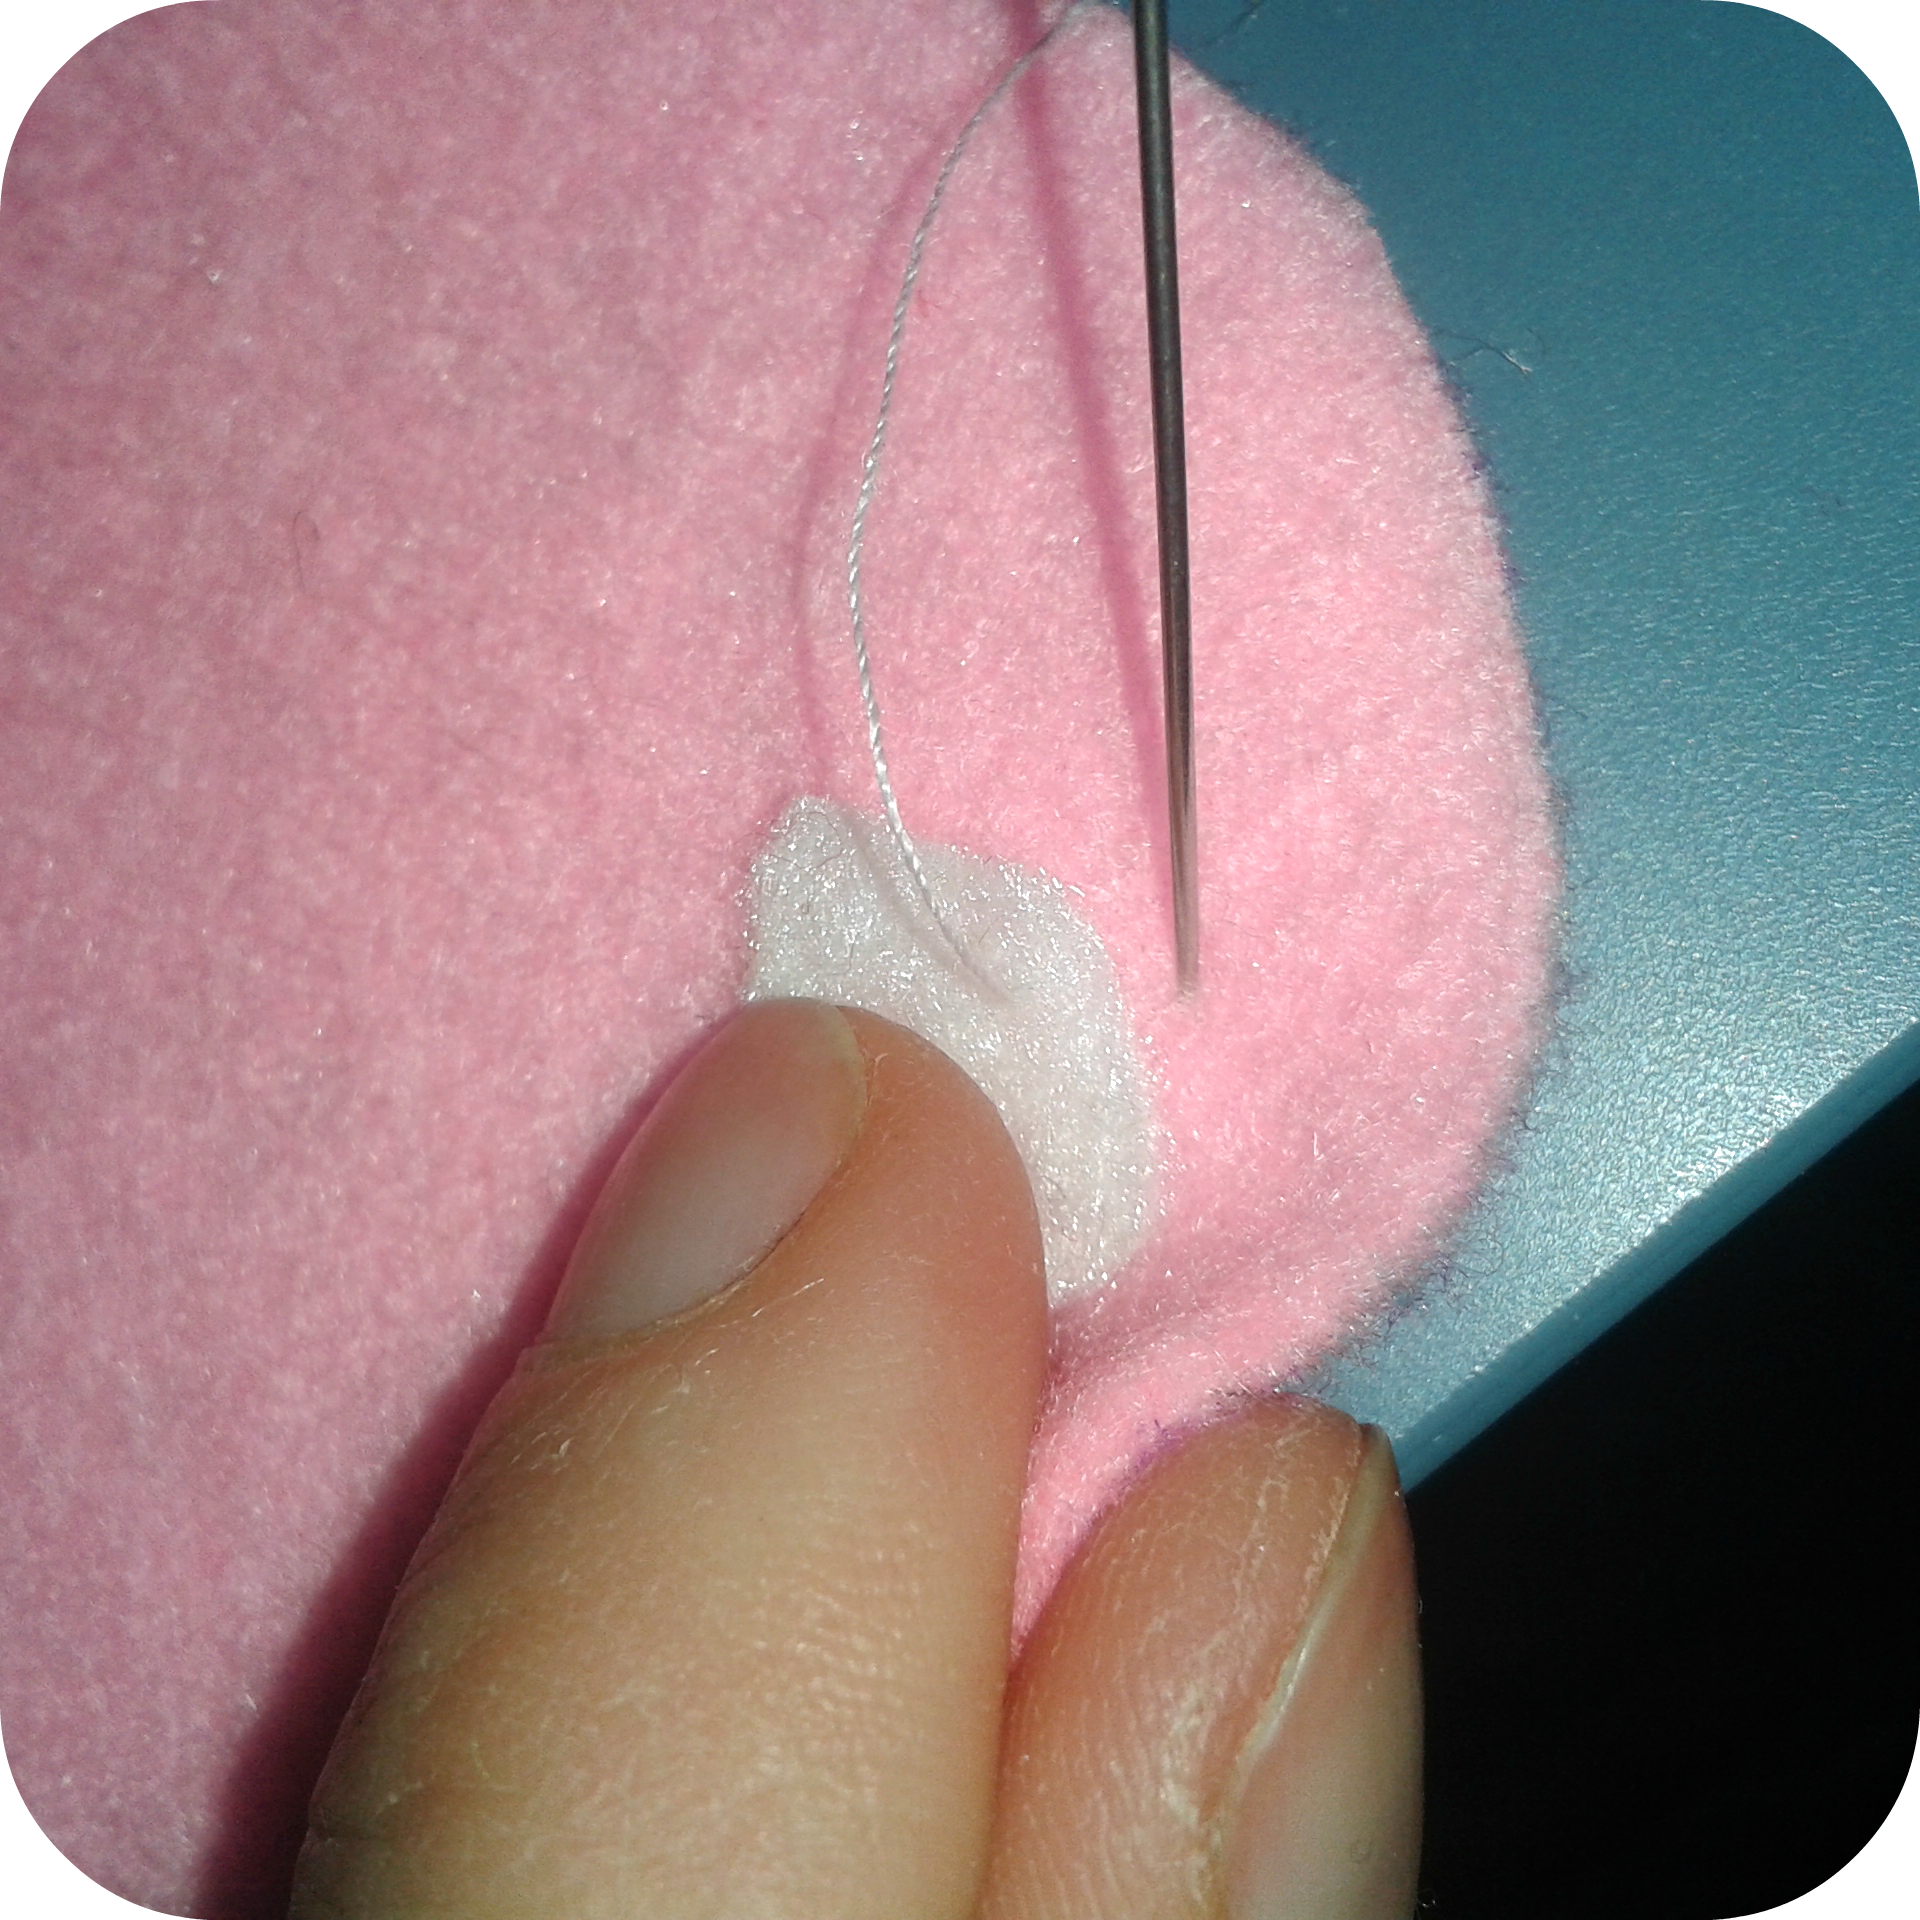
STEP 6: This step is the most trickiest part now. Get your standard needle and some white standard thread. Loop your needle and make a knot at the end of the thread. Take one white felt piece into your hand and stitch through it from bottom to top around 5 mm from the edge (see picture below).

Place the white felt piece back onto the pink one thereby hiding the knot in between both felt layers. Stitch into the pink felt next to the white felt piece (see picture below) and stitch back towards the white felt piece (see second picture below). The trick here is to NOT stitch completely through the pink felt but to stitch to the middle (i.e., to about 1 mm height of a 2 mm thick piece of felt) and at this height move the needle below the white felt. If you do this correctly, there will be no sewing/thread traces at the backside of your Mortadella slice.

STEP 7: Stitch around one white felt piece as explained in step 6. When you are done, make a knot very close to the edge of the white felt piece, then guide the needle through the pink felt below the white felt piece and come out again at the opposite edge (see picture below). Again, do NOT stitch completely through the pink felt. Pull and the knot will be pulled below the white felt piece where it will be invisible. Cut the thread close to the edge of the white felt piece while still pulling. This ensures that the end of the thread will disappear below the white felt piece once the tension is gone.

STEP 8: Repeat this for the remaining white felt pieces. If everything went fine, you will have at this stage something like what is shown in the picture below. The back side of your sausage slice will show no traces of any sewing processes.
FRONT:
 BACK:
BACK:

Below you will find 5 sausage slices for inspiration. If you turn your computer by 180 degrees, one of the slices is smiling at you. Did you find it? 🙂

And now? You are done! *applause, applause* You have made super-realistic felt Mortadella slices and I hope you had a lot of fun.
NOTE: There is a possibility to sew on all white felt pieces in only ONE step without making knots and cutting thread in between. If you want to learn how to do this, please have a look at my Felt Sausage Slices – Pimiento Loaf tutorial, which I am going to publish very soon. So please stop by again.
Last but not least keep in mind: A sausage a day increases your chance of a chronicle heart disease, but a felted sausage a day increases your chance of living happily ever after. 😉
Please click here and leave a comment… Ich freue mich auch sehr über Kommentare auf Deutsch.

Pingback: Tutorial with Free Pattern: Felt Sandwich Bread | Me & My Veritas
Die Paprikamortadella fehlt noch😄
Papa 😇 und Mutti 😈
LikeLike
Pingback: Free Tutorial with Pattern: Felt Sausage Slices – Pimiento Loaf | Me & My Veritas
Hallo Ihr zwei, 🙂 das Tutorial zur Paprika Lyoner habe ich soeben veröffentlicht. Zufrieden? 😉 Drück Euch, Jana
LikeLike
Pingback: Tutorial with Free Pattern: Felt Tomato Slice | Me & My Veritas
Pingback: Yummy Felt Food – Tutorials with Free Patterns Coming Soon! | Me & My Veritas
Pingback: DIY Felt Food: Complete Sandwich Set | Me & My Veritas